Since I decided to continue with my bullet journal journey this month, I needed a really cool theme for my February 2022 bullet journal design. After spending a ridiculous amount of time trying to decide what theme to use, I finally settled on a Care Bear theme for this month and I couldn’t be happier.
Of course, I was inspired by a similar design I saw posted on Pinterest. I used that idea as a jumping off point and instantly started researching all things Care Bears. I created my Care Bear board on Pinterest and didn’t look back. Once I had several examples saved to my board, I began laying out the pages of my theme in my journal.
Check out my design process below in order to see the final product.
The Design Process
Materials
Pencil
Colored Pencils
Fine Liner Pens
Crayola Markers
The Cover Pages
Originally, I wanted to create a gingham pattern on both pages introducing the month. However, I realized after sketching the two bears on each page that drawing the pattern would be more work than I wanted to do. Therefore, I just chose 4 colors to create the colorful striped border on the top and bottom of the pages. I think they turned out beautifully and fit the theme well.
As for the two bears, I went with the cute bear on a swing and the sunshine bear grinning from ear to ear for the second page. I finished out the design with a bunch of hearts and stars. Then, I printed out a colorful title and pasted it on the page underneath the swinging bear.
The Calendar Page
When I started the calendar design I was worried about how it was going to turn out. I initially thought it was going to be all pastel colored, but fate had another idea in mind. When I finished coloring the star and heart border, the design looked washed out compared to the brightly colored care bear. Therefore, I had to color over the light pink hearts with a bolder color. The end result is a beautifully bold creation that fits in perfectly with the theme.
The Mood and Habit Trackers
My mood tracker is simple and cute. It’s just a bunch of hearts hanging from several strings. Easily tying in with the rest of the theme.
The habit tracker happens to be my favorite page for this month despite how tedious it was to create. First, it has my favorite Care Bear which is Grumpy Bear (the lovable grump). Second, it has a heart and rain drop pattern all over the page that nicely surrounds the title, chart, and Grumpy.
The Weekly Spread
The last spread for the month contains a sleepy time Care Bear lounging on a large moon. I decided to round out the design with a star border and a yellow and brown title positioned in the center of the pages.
Final Thoughts
I genuinely enjoyed creating this bujo design for the month of February. The Care Bears are so adorable and really make me smile. It was one of the easiest designs for me to create to date. I think I’m going to enjoy looking at this month’s pages each day.
What do you think of my February theme? Tell me your thoughts in the comments below.
I’m a little late with this post because I had no clue as to what to do for this month’s theme. I finally settled on creating a Christmas theme at the last minute. I know, it’s very cliché for the month of December, but I wasn’t inspired to do anything else.
After I settled on a theme, I created my usual board on Pinterest and began setting up my journal. I tried to find holiday related drawings that were different than my previous design. Fortunately, I found a few ideas that I felt were cute enough to include in my design.
Check out my design process below in order to view the final results.
The Design Process
Materials
Pencil
Colored Pencils
Fine liner pens
Crayola Markers
Ruler
Erasers
Circle Stencil
The Cover Pages
My original idea was to create a North Pole sign with a sleigh next to it for the cover spread. However, when I started sketching things out, I changed my mind. I saw the penguins on Pinterest and thought that they would be a better fit. I wasn’t thrilled with the design at first, but once I started outlining the drawing with ink and adding color, I started to warm up to it.
The Calendar Page
The calendar page design is probably my favorite this month. It wasn’t part of my original plan, but I actually think it turned out way better. The Christmas gnome is simply adorable.
The Mood and Habit Trackers
I kept things real simple with the mood tracker by drawing a string of Christmas lights for the remaining days of the month.
For the habit tracker, I drew a variation of Rudolph at the top and bottom of the page. I love how the ornaments are hanging off of the antlers.
The Weekly Spreads
The weekly spread was fairly easy to draw. I drew a border across the top two pages and added two cute bears on the bottom corners of the pages. This spread was a cute way to finish out the theme for this month.
Final Thoughts
Even though this theme was created with only two weeks left in the month, I’m happy I was able to muster up the energy to make it happen. I think this design looks nice and is a good addition to my journal.
What do you think about my December design? Tell me your thoughts in the comments below.
During my cousin Kola’s visit to Arizona, we took a quick day trip to Sedona. I chose Sedona because it’s considered to be a beautiful and mystical place due to its scenery. Also, I figured she would enjoy taking photos of the various views of the red rocks and soaking up the local flavor.
Our Adventure Begins
We arrived in Sedona during the early part of the afternoon after a two hour drive. As I drove us down the main strip leading into the center of Sedona, Kola started taking pictures of the breathtaking red rock formations coming into view.
The Sedona McDonald’s
In an effort to keep our day laid back and stress free, I only loosely planned a few activities for our day in Sedona. For our first stop, we visited the one and only McDonald’s in the U.S. that doesn’t have the golden arches. In fact, the signature arches are a teal color because the locals would only allow them to build the location if it blended into the Sedona environment. I thought this would be a nice first stop on our trip for my cousin to see.
Aura Readings
After our photo op at Micky D’s, we travelled back to the main strip in order have our auras read. I couldn’t resist doing this activity because Sedona is known for having lots of soothsayers and psychics in the area. It is suppose to be a mystical place with strong lay lines. It was an amusing and enlightening experience.
Collectibles Shop
Once our readings were complete, we visited Son Silver West which was situated next door. This establishment was a large collectibles emporium filled with an assortment of odds and ends for the home as well as souvenirs (old signs, art, pottery, etc…). It was a great place to roam because there was a plethora to see at every turn. It was definitely a feast for the eyes.
Early Dinner
By the time we finished roaming through the store, we were ready to eat. We had asked the cashier at the aura shop to give us a few restaurant suggestions and she didn’t disappoint. Out of several options, we decided to visit Javelina Cantina since it was close to our location.
The restaurant was neatly tucked inside a hillside shopping area with views of the the red rock formations. The inside of the restaurant was decorated with Mexican décor and the atmosphere was easy going. The host was able to seat us immediately because we arrived early enough to beat the dinner crowd.
The menu had a variety of items to choose from. We ordered appetizers, a main course, and desserts. With the exception of the Mexican street corn, which was a little bland, we enjoyed every morsel.
Final Thoughts
Sedona is a must see for anyone visiting Arizona. The lovely views alone are worth the drive. It’s definitely a place for tourists that enjoy visiting places that are not the norm.
Here are a few tips if you decide to visit Sedona.
Tips
Visit the Sedona Website. It will offer a multitude of ideas for your visit.
Plan Ahead. There are a lot of activities to do in Sedona. It’s best to create a list so you will have an idea of where you are going and how to get there.
Check the weather. Sedona is located two hours north of the Phoenix area. Therefore, it experiences seasons unlike the southern part of the state. So, don’t expect it to be warm during the fall, winter, or early spring. Dress appropriately for the season.
Take Pictures. The views of the red rock formations are stunning and unique. Therefore, you will want to take plenty of pictures for your photo album or scrapbook.
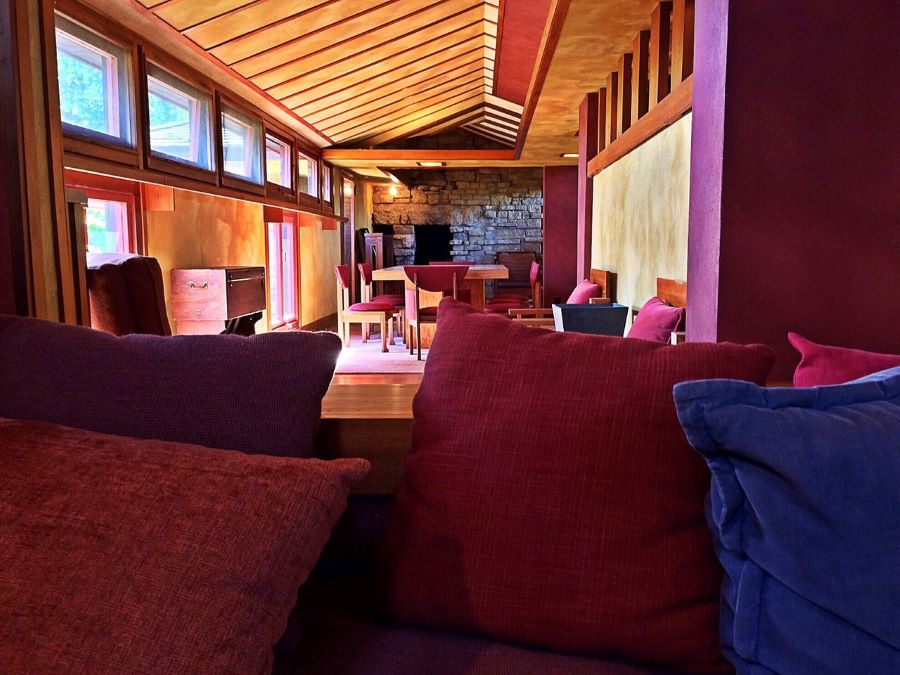
World renowned architect and educator Frank Lloyd Wright and his apprentices built a compound in Scottsdale, Arizona named Taliesin West. Established in 1937, Taliesin West is an architectural marvel dwelling in the heart of the desert. Taliesin was built as a winter home for Wright and his family which was also meant to inspire and educate future architects.
Today, Taliesin West still stands and continues to educate anyone interested in architecture and design. Take a moment to read about our experience touring Wright’s “Desert Laboratory” below to learn more about this popular attraction.
The Tour
Arrival and Check-in
Our adventure began with the drive to site on a bright and sunny afternoon. The GPS led us up a long and winding road for a few minutes. As we slowly drove up the road, we gazed at the landscape surrounding the laboratory. It was dry and sporadically littered with cacti (a normal view in Arizona). Eventually, the road ended at the parking lot and we easily found a parking space for the car.
We walked up the path and checked in at the kiosk. The staff member then gave us instructions on how to use our phones to login in and listen to the guided tour. As usual, my phone was acting goofy (no signal). Fortunately, they were able to provide me with a device and I was able to use it to listen to the tour.
Our Experience
The tour started at the entrance that was located between the kiosk and the parking lot. The moment the audio tour started, we were given some pretty interesting facts about the entrance design. According to the recording, every part of the design had a meaning. The location of signs, the placement of stones, the water features, etc… There was nothing there that wasn’t meant to be there. All features were there to serve a purpose. I was simply amazed at how much thought was put into the design of such a small area.
As we strolled along the path, our digital tour guide continued to explain each structure and the meaning behind its design. I was absolutely fascinated with the concept of compression and expansion that he used in his designs. Most of the buildings that we entered used this concept of small entrances that led into a wide open space. It was very cool.
Another impressive aspect of the design is how Wright and his apprentices worked hard to ensure that Taliesin fit into its environment. The concept of using local materials and creating a design that worked with the weather conditions and landscape of the Arizona desert was absolutely brilliant.
As we continued with the tour, we were able to witness how no stone was left unturned when it came to the design of Taliesin West. Wright and his team were able to think of how to survive living in extreme desert conditions by working with the materials he had at his disposal and learning as much as he could about the natural environment. While on tour we were able to witness how they incorporated these ideas into the design of the living quarters, his office space, the student workshop, and the structures where he entertained his guests.
The Gift Shop
Once the tour was over, I dropped off my listening device at the welcome kiosk and headed to the gift shop. The store was full of items which reflected Wright’s life and architectural style. It was filled with books, apparel, and a variety of art. After perusing the store, we walked back to the car and headed to our next destination.
The entire tour took approximately an hour and half. This included walking around, pausing the audio in order to soak up the sites, and time to take photos and videos.
Final Thoughts
Taliesin West is a delightful attraction to visit in Arizona. It not only provides information about Frank Lloyd Wright, but it also gives you a historical perspective of how his vision impacted the layout and design of Arizona and its landmarks. I definitely would recommend this site as a place to stop if you are visiting Arizona.
Here are a few tips to ensure you have a pleasant Taliesin West experience.
Tips
Use the website to plan your visit. The website is full of information on how to plan your visit, prices, and what to expect.
Purchase your tickets in advance. This will ensure you don’t have to wait and will be able to tour the facility on a day of your choosing.
Bring Water. No matter what time of the year you tour this attraction, Arizona is dry and you are bound to get dehydrated.
Wear sunscreen. This tour is predominately done outdoors and this area of Arizona is bright all year. Therefore, it is wise to wear some form of sunscreen or block while you are walking the grounds.
Bring your headphones. If you chose to do the self guided audio tour, you will need to use your headphones on your device or theirs.
Bring your phone. You will need your phone in order to connect to the website and tour info. If your device is unable to connect (like mine), you can use one of their devices. Just make sure you have your own set of headphones.
Wear comfortable shoes. You will be doing a lot of walking on this tour. You want to be comfortable as you stroll the grounds.
Wear sunglasses. Again, it is always bright and sunny here. There is a reason why they call it the “Valley of the Sun.”
In my quest to find kid friendly activities to do with my nieces during their two week visit, I came across As You Wish Pottery in Glendale, Arizona. It seemed like the perfect indoor activity to do with Noelle and Ayla on a hot and sunny Arizona afternoon. As usual, I checked out their website, viewed the prices, read about how it works, and booked our session. Easy as 1-2-3.
Our Experience
The Location
The As You Wish we visited was located in Glendale, AZ. It was nestled in what appeared to be an entertainment district. The building was surrounded by restaurants, a mall, and a movie theater. Making it a convenient location to plan an entire afternoon of activities in one spot. Therefore, we decided to paint our pottery at 11 am, then head to a late lunch at one of the restaurants around the corner from the pottery place afterwards.
The Painting Session
We were able to check in and be seated as soon as we arrived. There were a few other people painting their pottery at the time of our visit, but there was enough space and tables so that everyone could safely enjoy their painting experience.
Step 1: Gather Your Materials
As we were getting settled at our table, I immediately noticed the bright and fun décor of the place. The walls were painted in rich purples and vibrant greens. The long wall to the left of the entrance was filled with an assortment of pottery for customers to choose from. The wall straight ahead contained cabinets and drawers filled with all of the materials needed to paint your pottery piece (paint, stencils, sponges, etc…). Additionally, the tables were already set up with paint brushes, palettes, bowls of water, and sponges needed for your session.
The girls, Gigi, and I headed over to the pottery wall first and browsed the selection. We allowed the girls to pick whatever tickled their fancy. Ayla chose a dog and Noelle chose a princess. Next, we headed to the supply area to gather the paint colors the girls wanted to use. Gigi and I opted to just watch and assist the girls with their projects during our session, which turned out to be the right choice.
Step 2: Paint Your Pottery
Once we returned to our table with all of our supplies, one of the staff members came to over to explain the pottery painting basics. These basics proved to be quite helpful as the girls started to paint their figurines. I assisted Noelle, while Gigi worked with Ayla.
Ayla and Noelle spent the next hour and half creating their masterpieces. My mother and I looked on and helped when needed. They both did an excellent job of painting their pottery pieces. It was fun watching their figurines come to life with their unique artistic touches.
Step 3: Turn in Your Creation at the Front Counter and Pay
After the girls finished painting and were pleased with their creations, we took their pieces to the front counter and paid for the pottery and session. The staff member then explained that the pieces would be ready in approximately five days and told us the earliest date we could pick them up.
Final Thoughts
We had a wonderful time at As You Wish Pottery Painting Place. The girls enjoyed painting their pottery and Gigi and I were happy to watch them have fun and be creative. This was an entertaining arts and crafts activity to do with the kids and we would definitely go again. I would highly recommend this to people of all ages looking for something fun and different to do for their next outing. It’s a nice way to bond and create memories.
Here are a few tips to help you plan your visit to As You Wish Pottery.
Tips
Make your reservations online. It’s convenient, quick, and easy.
Expect to be there a minimum of two hours. It takes time to get settled, choose your pottery piece, gather materials, and paint.
Be aware of the cost. There is a fee per person for the session and a separate fee for each piece of pottery that is selected. The price of each piece of pottery ranges from $12-25 per piece.
Take snacks and water. Since you will be there a while, it might be wise to have these items on hand. Especially, if you have kids with you.
Listen to the pointers given by the staff. If this is your first visit, it’s good to have them explain the basics in order for your creation to look its best.
Guide younger children as they paint and create. Sometimes, children forget some of the basics while they are creating. They may also need assistance if they lack the hand and eye coordination to successfully paint the pottery. Therefore, remind them to cover all areas, add enough paint, and help them when needed. This will ensure they achieve the desired end result.
Paint your initials on your pottery. This makes it easy to identify when you pick it up later.
Take a picture of your pottery. This is just an added precaution just in case they can’t find or identify your pottery at the time of pick up.
My family loves all things tea. This includes tea cups, tea pots, and having afternoon tea together. Therefore, having lunch and tea at The Spicery in Glendale was a perfect activity for us to have during my nieces two week visit.
If you love having afternoon tea like we do, take a moment to read the post below to see how our visit went at the Spicery.
The Location
The Spicery in Our 1895 Home is located in a converted house in Glendale Arizona. It’s located in what looks like a quaint and unassuming one level sage green house. However, looks can be very deceiving. Once we walked the brick pathway up to the front door and stepped inside, we were in for a pleasant surprise.
The house is actually filled with vintage decor from floor to ceiling. You immediately feel like you have stepped back in time upon entering the Spicery. The shelves and cabinets contain tea pots and cups of all shapes and sizes. The walls are lined with floral wallpaper, pictures, and other accessories that remind you of grandma’s house. The tables are covered in lace tablecloths with small floral arrangements placed in the center. It was the perfect setting for afternoon tea with Gigi and the girls.
Our Experience
The Seating
Once we checked in with the hostess (I made a reservation two days in advance), we were escorted to our table. As we walked through the house to our seats, we saw that there were several rooms in the house (the house was much larger than we expected). We noticed that each room had its own theme and set up. It was definitely a sight to behold.
Our table was located near the rear of the house. It was already set with a lace cloth, tea cups, napkins, utensils, and menus. We each had our own unique cup and plate. Even our seats were all different. It was a lovely, yet eclectic look. Everything you would expect for afternoon tea.
Service and Food
When you make a reservation at the Spicery, they ask you to place your order in advance so they know what to prepare for your visit. Therefore, I ordered the three course meal for the four of us. A children’s version for the girls and the adult version for me and Gigi. It turned out to be the best choice for our meal.
After we sat and viewed the tea menu for a few minutes, the waitress came to take our tea order. She also explained what food would come out for each course. The tea would come out with the first course and be refilled throughout the meal if needed. Then each subsequent course would come out when the previous course was completed.
The First Course
The first course consisted of tea, scones, and fruit. It was a great start to our meal. We loved our tea, but we especially loved the scones, butter, and flavored creme. You could tell that Ayla and Gigi really enjoyed the flavored creme because they were eating it directly from the spoon instead of smearing it onto their scones.
The Second Course
The second course consisted of the savory food. We were served a variety of tea sandwiches filled with chicken salad, egg salad, turkey, ham, and cheese. Each one was tasty and filling. Our bellies were almost stuffed before we even reached the third course.
The Third Course
For our third and final course we had a variety of desserts. Even though our stomachs were almost at maximum capacity, we tasted a few of them for good measure. We were served cupcakes, lemon bars, and parfaits. All of them were equally good and delectable.
Final Thoughts
I have nothing but positive things to say about The Spicery in Our House in Glendale. It was a delightful place to visit. The food and tea were great and the service was excellent. I was so happy to share this experience with my family. Especially, with my mother who instilled within us a love for tea and an appreciation for tea sets. I was really happy to see her enjoy herself throughout the experience.
Tips For Your Visit
Call ahead and make a reservation. You will not be able to get a seat without calling in advance.
Order your food while you are making a reservation. You will have to ask them about their menu over the phone because their website doesn’t provide a full menu to view.
Explore the venue and take plenty of pictures. There is a lot to take in and you will definitely want to have pictures for future reference and memories.
In summary, I definitely recommend the Spicery for a fun afternoon activity. The food and tea are delicious and the atmosphere is a delight to behold.
My September 2021 bullet journal design is all about the bonsai tree. This design was inspired by the bullet journal spreads created by Julianne Doodles and Bullet Journal by Lena on Instagram. I decided to use this design for the month of September because it was beautiful and simplistic at the same time. Much easier to complete than my August bujo design.
If you would like to see how this theme turned out, check out my design process below.
After viewing a few bonsai tree bullet journal examples, the cover page design was a breeze to complete. I chose to draw one large bonsai tree on the title page and two smaller ones on the notes page. I used my color scheme of peach, brown, and grey to color all of the trees. Finally, I added an easy decoration to all four corners of each page in order to make the design look a look a little more polished and complete.
Cover Pages
The Calendar
The calendar page has two more bonsai trees that look slightly different from the cover pages. I used the same color scheme and corner design as the first two pages. Finally, I finished this page off with few stars, sparkles, and circles in order to give it a little extra something to make it stand out.
Calendar
The Mood and Habit Trackers
Both the mood and habit tracker pages are a continuation of the bonsai theme and color palette. I love the mood tracker for this theme because it consists of several bushy bonsai trees. Each bush on the trees represents a day of the month.
The habit tracker page is pretty self explanatory. I just added more unique looking bonsai trees and decorative corners to the page and colored it will my the same color scheme as the previous pages.
Mood and Habit Trackers
The Weekly Spreads
The weekly pages are pretty much more of the same. I drew a bonsai tree at the bottom of each page and added the fancy corners to each page to complete the look.
Weekly Spread
Final Thoughts
Even though I had a hard time getting motivated to complete September’s bullet journal design, I’m glad that I finally worked up the energy and desire to get it done. It turned out to be a pleasure to draw and complete. I’m very happy with the end result.
What do you think of my September theme? Tell me in the comments below.
The activities list for my nieces two week visit was vast. I had everything you could do inside with children in this hot Arizona heat on my list. The list ranged from activities we could do in the house to visiting museums. We tried to think of a variety of activities so they wouldn’t be bored during their visit. Remarkably, the one place that proved to be one our most fun activities didn’t make the list because I had never heard of it. That place was the PixyPros Selfie Museum in Arrowhead Mall.
So How Did We Find This Place?
We actually came across PixyPros by accident. We were originally heading to the Build A Bear store in the same mall, but due to our late start that morning, we didn’t make it in time. They had a limited capacity and were full the rest of the day. We were a little disappointed, but made the best of the situation. So, we just roamed the mall instead buying treats and doing some light shopping.
Arabian Nights
Our Luck Changed For the Better
As we were making our way to the food court, we walked pass the PixyPros location. Something about the vibrant colors and music captured my attention, so I decided to walk in and take a look. The young man working the counter gave me a brief introduction about the establishment and how it worked. He also explained the pricing (which was very affordable).
Super Models
Me and the girls walked around and really liked what we saw. There were a variety of sets to choose from. Each set was colorful and unique. There was something there for everybody. Plus, every set was equipped with a ring light and cell phone attachment which made taking photos easier.
On Lockdown
After our little tour of the venue was over, I immediately thought it was a cool idea, but decided to wait before I made a decision.
What Happened Next?
An hour later, after we had finished our lunch and shopping, I felt a strong urge to go back to PixyPros. I really didn’t want to head home without doing something fun since Build A Bear was a bust that day. So, I convinced GiGi and the girls that we should take some fun photos at PixyPros.
Playing on the Swings
While Gigi sat in the food court watching our bags, I took Ayla and Noelle back to PixyPros. I paid the $20 fee and got started. Originally, we were only going to take photos on the swing set, but we were having so much fun that we decided to do more.
All Hail the Queen
As we hopped from one vignette to the next, the more fun we had. The music and the fun backgrounds made it such an exciting place to be. Plus, Noelle and Ayla looked so cute in each setting. The clothes they wore that day just seemed perfect against each background. By the time we were finished, we had at least 60 or more shots to choose from.
Breakfast at Tiffany’s
Unfortunately, what was supposed to be a 10 minute activity turned into 35. GiGi was shocked that we were gone so long, but when she saw the pictures, she understood. She was so thrilled to have such nice photos of her adorable granddaughters that she forgave us for taking forever.
Tropical Vacay
Final Thoughts
PixyPros is a fun place for adults and children alike. The combination of colorful settings and music make it a great experience for everyone to enjoy. Additionally, the pricing makes it an affordable activity for both individuals and groups as well. Therefore, I highly recommend PixyPros for your next entertaining activity.
The science teacher in me enjoys exposing children to the wonders of science, but finding the right experiments to do at home can be tough. That’s why I was so excited to find the blooming paper flower experiment on Pinterest. It looked fun and easy to achieve. Plus, it incorporated art and science into one fun activity.
Take a look at how we completed the activity below for more information.
As I mentioned in the intro, I found this activity on Pinterest. I instantly thought that the pretty flowers “blooming” in water would captivate my nieces’ attention. Therefore, I quickly started clicking on the link to find out more about this experiment. The link led me to the Teach Beside Me website which contained all of the information required to complete the activity.
Materials
Once on the website, I realized the experiment was relatively simple to complete. It required only a few materials that I had lying around the house.
printer paper
flower template
pan filled with water
crayons or markers
scissors
food coloring (optional)
Procedure
The instructions were fairly simple.
Print out the flower template from the computer.
Color the flowers using crayons or markers.
Fold each petal of the flower inward.
Fill a bowl or pan with water. Add food coloring for some extra pizazz (optional).
Place the folded flowers into the pan of water and watch them “bloom”.
The Process
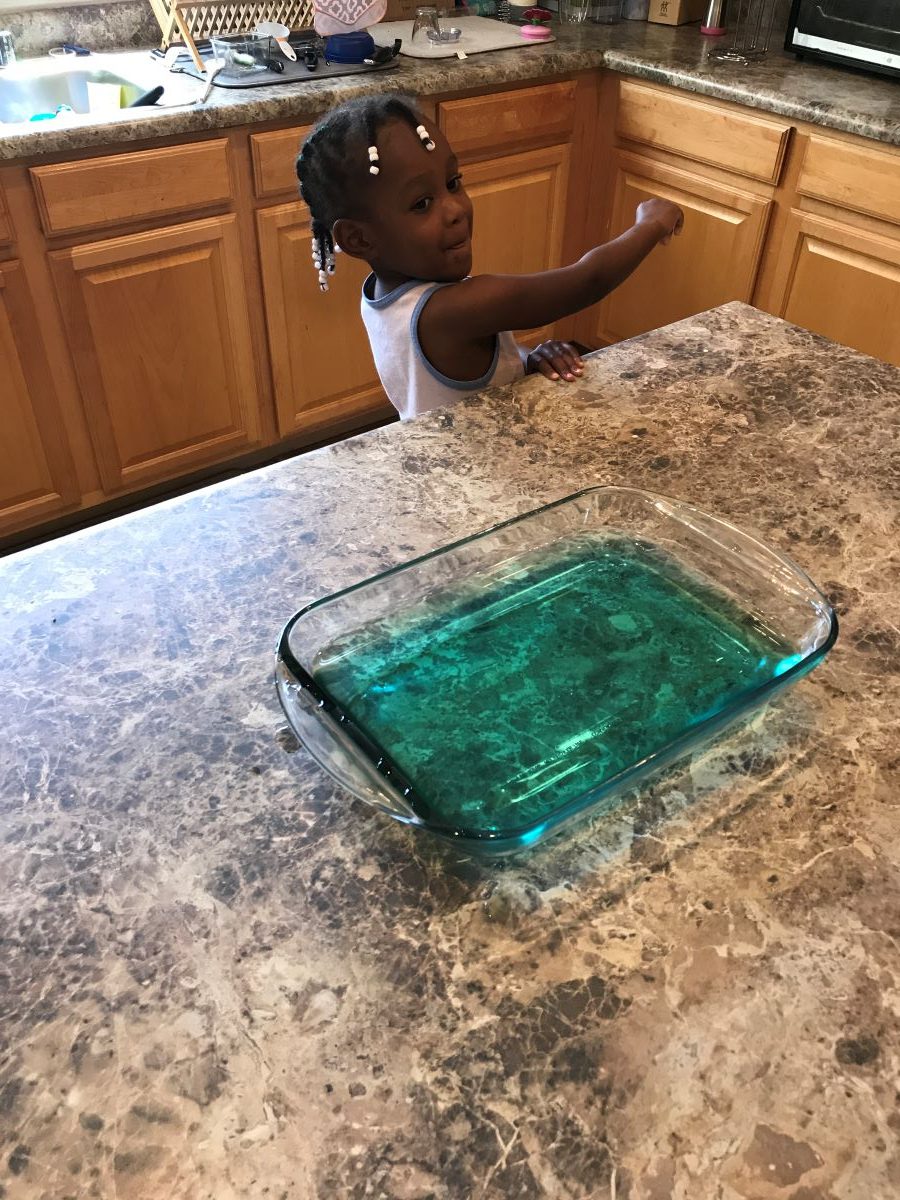
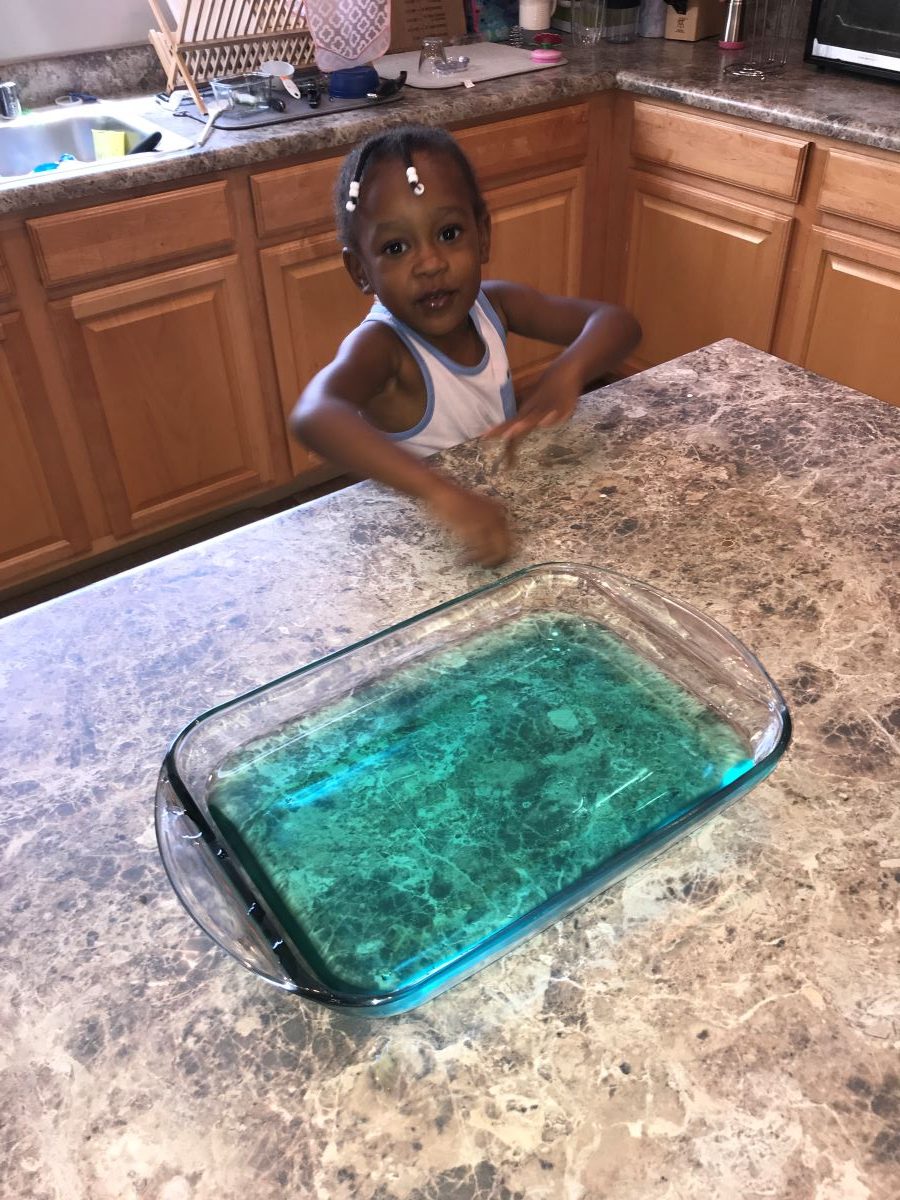
While I was planning this activity, my experience as a science teacher kicked in immediately. First, I gathered all of the materials in one place. Then I printed and cut the flowers ahead of time because neither one of the children had the fine motor skills to do this part of the activity. Finally, I filled the glass baking dish with water and food coloring and sat it on the kitchen counter.
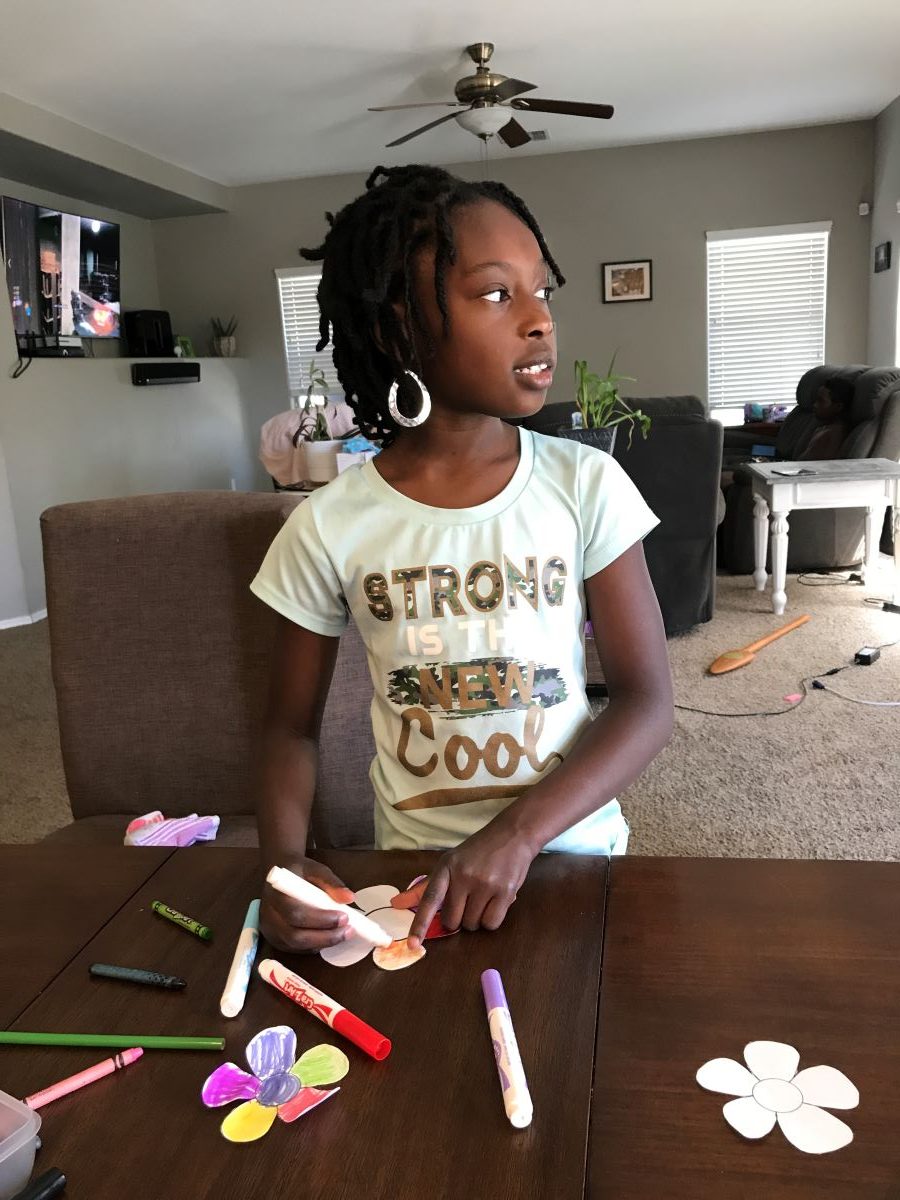
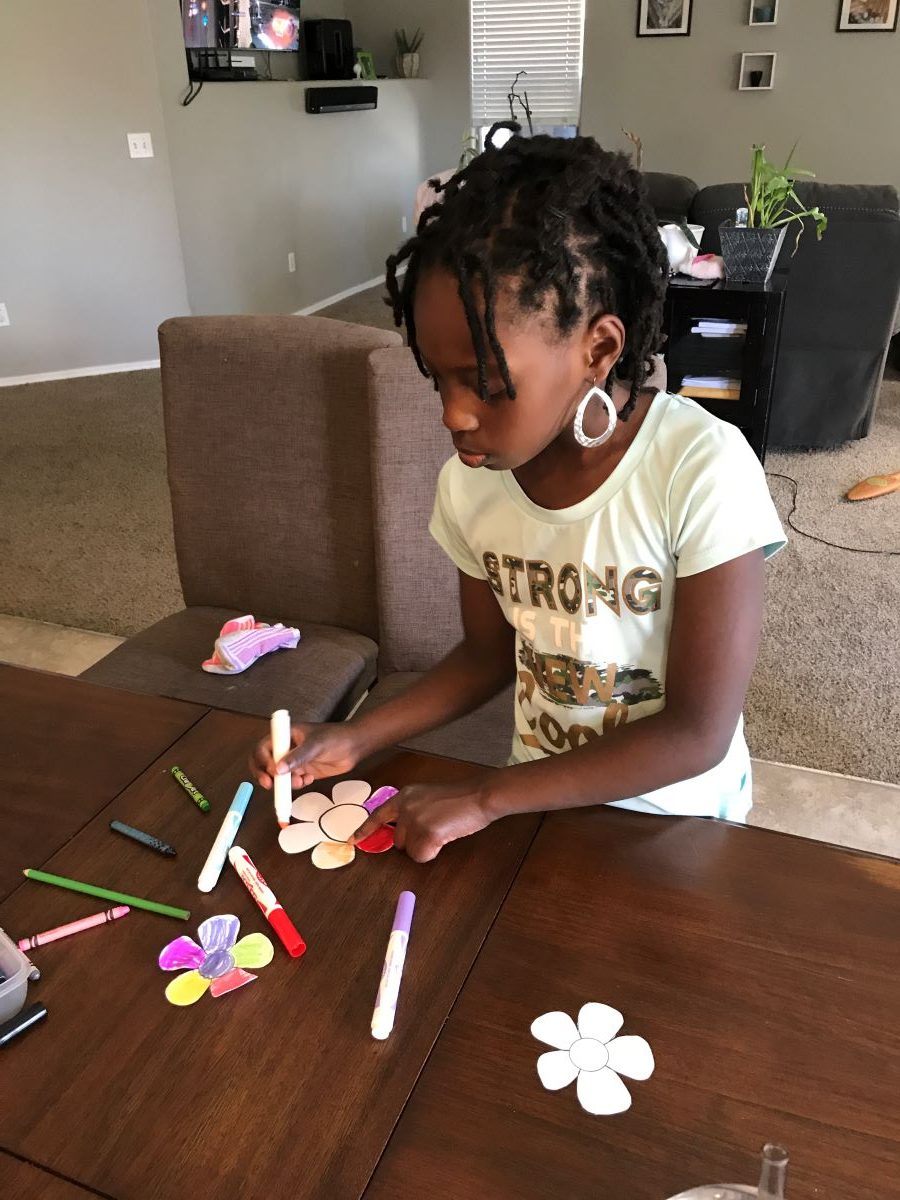
I then presented the activity to my nieces who were excited to do another fun science project. I gave them the cut out flowers to color with the marker and crayons. They really enjoyed that part of the experiment because it allowed them to flex their creative muscles.
Ayla coloring the paper flowers.Coloring the flowers.
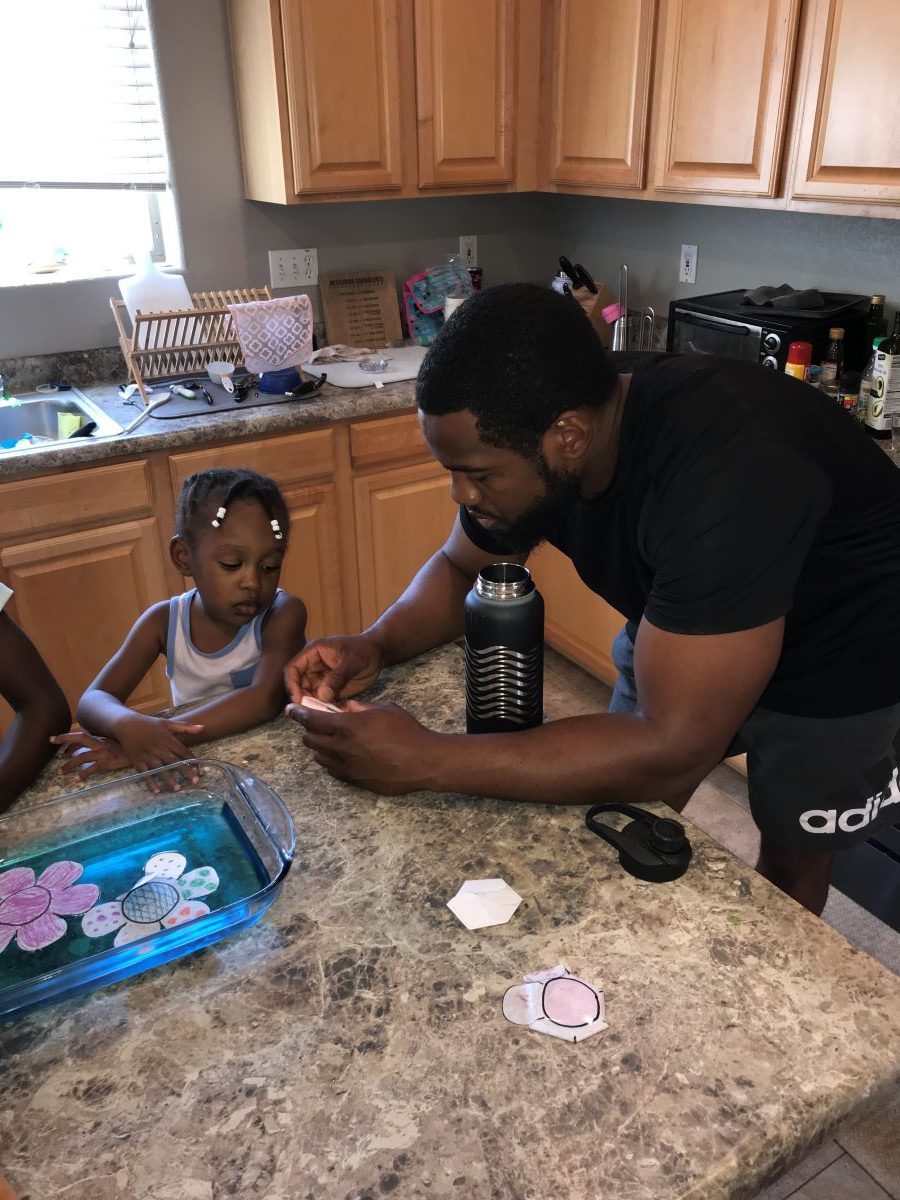
Then, I showed Ayla how to fold her set of flowers. I folded Noelle’s because she was only 2.5 years old at the time we did this project.
Noelle eagerly waiting to get started.
The Results
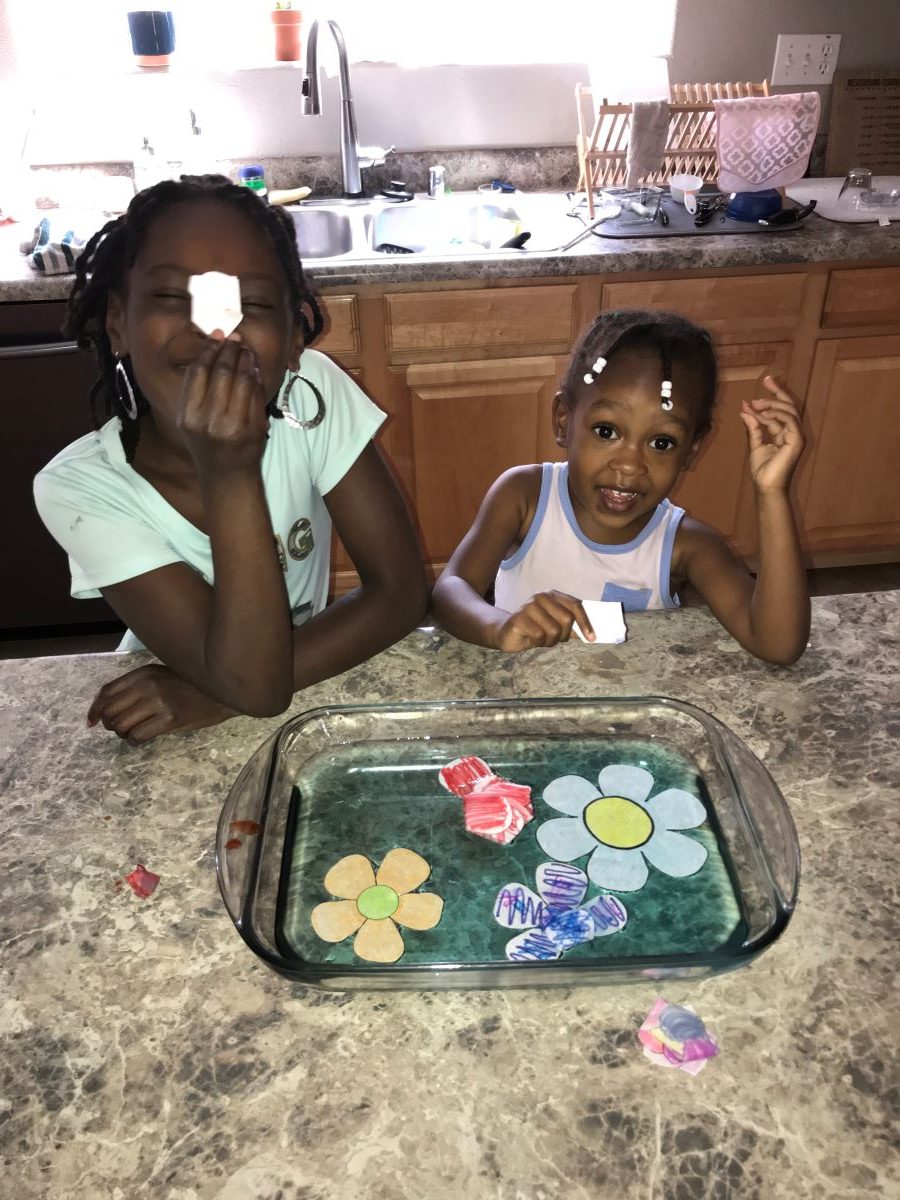
Finally, we took our flowers to the kitchen and placed them into our pan of blue water. The girls were instantly in awe of how the flowers opened up once they were placed in water. It seemed almost magical to them. I absolutely loved the look on their faces as they watched the flowers unfold one after another.
After a few tries, I explained that the flowers “bloomed” due to capillary action. I didn’t get too deep with the explanation because their young minds weren’t ready for a heavy scientific answer. I just told them that the paper absorbed the water causing the flower to unfold. That was a sufficient enough answer in the moment.
Flower Experiment Video 1Flower Experiment Video 2
**Special Note**
We found that the flowers colored with crayon worked better and lasted longer than the ones colored with marker. The ones colored with marker got soggy and the ink bled into the water. We weren’t able to reuse them after one use. The flowers colored with crayon seemed to work better. Apparently, the waxy coating acted as a waterproof layer which preserved the flowers a little better. They dried pretty well and we were able to use them again.
After we finished playing with the flowers, we cleaned up our mess, put our supplies away, and moved on with our day.
Final Thoughts
In conclusion, I think this experiment is a fun activity to do with children. It’s easy to set up, execute, and explain to young children. Try it with the kids in your life. I promise you won’t regret it.
My mother and I enjoy hosting a festive gathering from time to time. It’s always fun to eat good food, listen to music, and chat with family and friends. Even though we always have a good time the day of the event, the days leading up to the party can be a little stressful. The planning and set up phases can sometimes feel like a chore. That’s why I have come up with these 11 easy party planning tips and tricks to help plan your next event.
Take a look at the tips below for some great party planning ideas.
Tip 1: Plan
Planning is a crucial part of having a successful party. Taking the time to sit down and plan every aspect of your party in advance is key to executing a great party and will help eliminate stress. In your plan, you need to include information about budget, supplies, menu, guests, theme, date, time, etc…
You can write your ideas down on paper, type them into a Word document, or use an app. The point is to write your thoughts down and use them as a reference while you are preparing for your party. As you continue to prepare for your event, you can check items off of your list as you go.
I’m personally a fan of checklists. I like being able to check things off of my list as I go. It gives me a since of accomplishment and I feel like I’m achieving my goals.
Tip 2: Create a Guest List
Getting your guest list together can be tricky, but it’s crucial to having a successful party. There are a lot of factors you must take into consideration when you are creating a guest list.
First, you must consider the size of your space. That helps to determine the number of people you should invite that can fit comfortably in the space.
Second, you need to consider the type of party you are having. Some parties need to be a particular size depending on the theme for the night.
Third, you need to consider your budget when generating a guest list because it takes money to accommodate your guests.
Once you have created your guest list, STICK TO IT. Be sure that you clearly state in the invite how many people are invited to the party and if they are allowed to bring another guest. Letting them know this up front will eliminate a lot of headaches in the end. You don’t want more people at your party than you can handle.
Tip 3 : Send Out Invitations
Once you have created your guest list, you need to send out invitations to your guests. The general rule is that you should send out your invitations at least three weeks in advance for casual gatherings . That way, your guests have time to respond. For more formal events, you should send out invitations further in advance (six to eight weeks).
Invitations can be sent in a variety of ways.
Send paper invitations through the mail
Email invitations using sites such as Evites or Paperless Post
When you are planning your event you must consider whether you want to have it in your home or at another location. Costs, time, space, & the number of guests will help determine whether or not you should have it at home or away. If you have the budget to have the party at another venue, then I say go for it. I find that it makes life a little easier if you have it elsewhere. It eliminates the need for you to cook, clean or prepare. The only thing you really have to do is plan and coordinate with the venue, then let them handle the rest. That way, all that you need to do is show up the day of the party and enjoy the fun. Just be sure you have chosen a venue that has a good reputation and is willing to work with you.
Tip 5: Check Your Supplies
Once you have created your plan and have listed all of the materials needed for the party, be sure to check your kitchen, pantry & closets for everything on your list. You may have most, if not all, of the materials needed for your party. Check off items on your list as you go along in order to ensure you only buy or borrow materials that are absolutely necessary and you don’t own.
Tip 6: Gather Your Materials
Once you have checked your home or storage for supplies, it’s time to gather the materials that you do not have for your party. You can either purchase them yourself, if you want to keep them for future events or borrow them. However, BE CAREFUL when you borrow materials from a friend or supplier. Make sure they are in good condition IN ADVANCE. By checking the materials in advance, you can be sure they function properly or if they don’t, find replacement materials that are in better condition before the party.
When to Buy: If you know you will have more gatherings and the supplies will be used more than once or if the item can’t be borrowed.
When to Borrow or Rent: If you know that you will only use the supplies only one time.
Tip 7: Purchase Your Party Supplies
The following establishments are just suggestions. You may purchase these items wherever you desire based on your budget and location. Try to stick to your budget and list when making purchases.
Party City
Amazon
AC Moore
Michaels
JoAnns
Crate And Barrel
Thrift Stores
Prop Stores
Target
Walmart
Bed Bath & Beyond
Dollar Stores
Any store that may sale party supplies, dishes, table linen, etc…
Any arts and crafts stores
Tip 8: Plan the Menu
The menu should be based on the type of party you are planning and the guests you plan to invite. You want all of your guests to be able to eat and drink while they are enjoying the festivities. Therefore, you will also need to take the dietary needs of your guests into consideration. Having both alcoholic & non-alcoholic drinks available is a wise choice. You should also have a variety appetizers, main dishes, & desserts that will accommodate a variety of tastes. Keep in mind that you might have guests who are vegetarian, don’t eat certain types of meat, or have food allergies.
Another decision you may have to make when planning a menu is if you plan on cooking the food yourself or having it catered. Cooking the food yourself might be more cost effective, but it also can be more time consuming. You definitely need to make time in your schedule to prepare the food for the party in advance in order to have everything ready for the party on time. If you decide to have it catered, you have to make room in your budget to order the food. You will also have to make time to pick up the food or be sure it can be delivered in time for the party.
Finally, some people like to ask guests to bring food or drink to the party. Like a potluck of sorts. There are pros and cons to this idea. Two major pros for this idea are that it’s cost effective and it cuts down on your time in the kitchen. However, the con to this idea is that some people may have good intentions, but don’t really follow through. If they don’t follow through, then you may not have enough food or drink for all of your guests. So be careful with the potluck concept. You want to be sure that the people you ask to bring something to the party are reliable and will follow through.
Tip 9: Start Cleaning and Setting Up a Week in Advance
Getting your home reading for a party can be a daunting task. If you work full or part time, it can really be difficult to properly prepare for a party. I have found that it makes life easier if I start cleaning, preparing, & decorating my home for guests at least a week in advance so that I’m not overwhelmed the day before or the day of the party. I like to clean or complete one task each day leading up to the party. That way, when the big day arrives, most (if not all) of the work is done and I can relax and enjoy the party. I also like to take off the day before a party so I can tie up any loose ends and do last minute preparations without having to worry about getting things ready after a long, hard day at work.
Tip 10: Get Crafty With D.I.Y. Projects
D.I.Y. (Do It Yourself) projects can be a great way to decorate for your party. If you are a crafty person, there are a lot of ways to create wonderful decorations, centerpieces, and tablescapes to embellish your party space. In order to successfully complete your D.I.Y. project, be sure to plan and gather your materials well in advance. You want to make sure you have everything you need to implement the project in addition to getting it done in time to decorate for the party. There are many resources and ideas online and at your local bookstore that will help you decorate like a pro. However, if you are not a crafty person and don’t have many crafty friends, there is no shame in buying pre-made decorations. Everybody can’t be Martha Stewart.
Tip 11: Engage Your Guests With Fun Activities and Games
Activities & games are a fun way to engage your guests and get the party started. I have read on some websites that party activities are juvenile, corny, annoying and shouldn’t be done. However, I personally think it depends on the theme of the party and the type of people you invite. If you take those factors into consideration, you should be able to determine if games or activities are appropriate for your party or not. You can find a lot of ideas for party activities online or in the bookstore. Especially, if the party has a fun theme. Play away and enjoy.
Tip 12: Decide on the Type of Music You Want to Play
Music helps set the mood or tone for a party. The choice of music depends on the theme of the party, the activities you have planned, and the mood you want to create. You can either create your own music list, play a streaming station like Pandora or Spotify, hire a DJ, or have no music at all. The choice is yours. Just be sure to plan your music ahead of time so it’s ready at the start of the party.
Hosting a Galentine’s Day party is a great way to celebrate the women in your life. Originally, created by the character Leslie Knope on the show Parks and Recreation back in 2010, it was a fictional holiday that actually caught on in in the real world. Since then, women around the world have been gathering for Galentine’s Day parties to honor the women in their lives.
Galentine’s Day is normally observed on February 13th, the day before Valentine’s Day. During this fun celebration, NO BOYS ARE ALLOWED. It’s a GIRLS ONLY gathering. It is also a fun and creative way to celebrate your sister-friends.
Whether you celebrate with one friend or a large group of gal pals, you can celebrate Galentine’s Day in style with these fun ideas. Check out the remainder of this post for great Galentine’s Day party tips for a festive celebration every one can enjoy.
SPECIAL NOTE: Many of these ideas can be done at home or at a public venue. Of course this all depends on if we are out of quarantine and it’s safe to gather in a group publicly again.
1. Come Up With a Great Party Theme
Photo by Carolyn Christine on Unsplash
A good theme sets the tone of a party. Here are some cool party themes for an adult Galentine’s Day party your guests won’t forget.
Cookies and Cocktails
Spa Day
Pancakes and Pajamas (slumber party)
Luau
Masks and Mimosas (pampering/facials)
Paris
Tea Party
Breakfast at Tiffany’s
Glamping
Celebrate a specific decade (a 70’s or 80’s themed party)
Brunch
Chic Picnic
2. Select Your Food and Drinks
Photo By Kelsey Chance on Unsplash
The type of food and drinks you have depend on your theme, budget, and time. However, no matter what your situation may be, it’s always nice have something good for your guests to nibble on while they party the night away.
Order party trays from a local grocery store – This idea is great if you have the money and don’t have time to cook for the event ahead of time.
Create a signature drink that fits the party theme.
Design a Galentine’s Day charcuterie tray with snacks and sweet treats that fit your theme.
Have a pot luck. Ask your friends to bring their favorite dish to the event.
Fix a bunch of appetizers and display them on party trays.
If you are real fancy and can afford it, have it catered.
3. Decorate
Photo by Clem Onojeghuo on Unsplash
Put up party decorations based on your theme. Decorations can come in the form of streamers, balloons, wall decorations, decorative plates and cute cups. For my Galentine’s Day party back in 2016, I went with the standard red and pink hearts and flowers for my decor.
Party decorations can be found everywhere. Places like Target, Michaels, Walmart, and Party City all have wonderful decorations to fit a multitude of themes year round.
4. Plan Fun Activities for the Party
Photo by Steve Johnson on Unsplash
You should have a fun activity or two planned for your guests to participate in while they attend your event.
Here are a few suggestions to get the party started right.
Sip and paint
Arts and crafts
Do each other’s makeup
Secret Cupid gift exchange
Watch romantic comedy movies
Decorate cookies
Play games
Manicures/Pedicures
Wine tasting
Bake and take
Iron Chef Challenge
Create a variety of cocktail recipes
Make handmade Galentine’s cards for each other
5. Make Gift Bags for Your Guests
Create gift bags for your guests to take home with them when the party is over. Party gifts can range from cheap to expensive based on your budget. I put things like lip gloss and fingernail polish in my gift boxes as parting gifts for my guests.
6. Take Plenty of Pictures
Photo by Joseph Kellner on Unsplash
Be sure to take plenty of pictures of the event. Share them with your guests via text, email, or social media.
You could also create a photo collage or slideshow of the evening’s festivities to send to your friends so they will always have a copy of the good times you all shared.
Photo by Nino Kojo on Unsplash
BONUS TIP!
Throw a Virtual Party
Photo by Chris Montgomery on Unsplash
Due to the Covid-19 pandemic, many of us are unable to gather in a group setting. Therefore, we have to be creative if we want to celebrate with loved ones.
Thanks to technology, we can gather virtually with our family and friends. Take a moment to view the tips below if you choose to celebrate with your girlfriends virtually for Galentine’s Day.
Do a virtual class together online.
Have a virtual sip and paint. Order pre-printed canvases online and paint them together online via your favorite virtual app.
Host a virtual party via Zoom.
Send each other Galentine’s Day cards virtually or via regular snail mail.
Have a virtual meal together and chat the night away.
Make PowerPoints about random topics (hot guys, favorite movies, favorite foods, etc..) or create slideshows about each other.
Put on a virtual variety or talent show.
These tips and tricks should help any hostess create a fun Galentine’s Day event that her guests won’t forget.
Have you hosted a Galentine’s Day Party? Do you have any tips? Let me know in the comments below.
Tree 1: A tree made with the same size circles and varying shades of red.
Christmas is upon us, and it’s time to deck the halls and the walls with pretty décor. For many of us, that means breaking out the decorations from Christmases past and blowing the dust off before we set them out. However, for some of us starting from scratch with limited funds, that means we have to get creative and handy when it comes to decorating for the holidays.
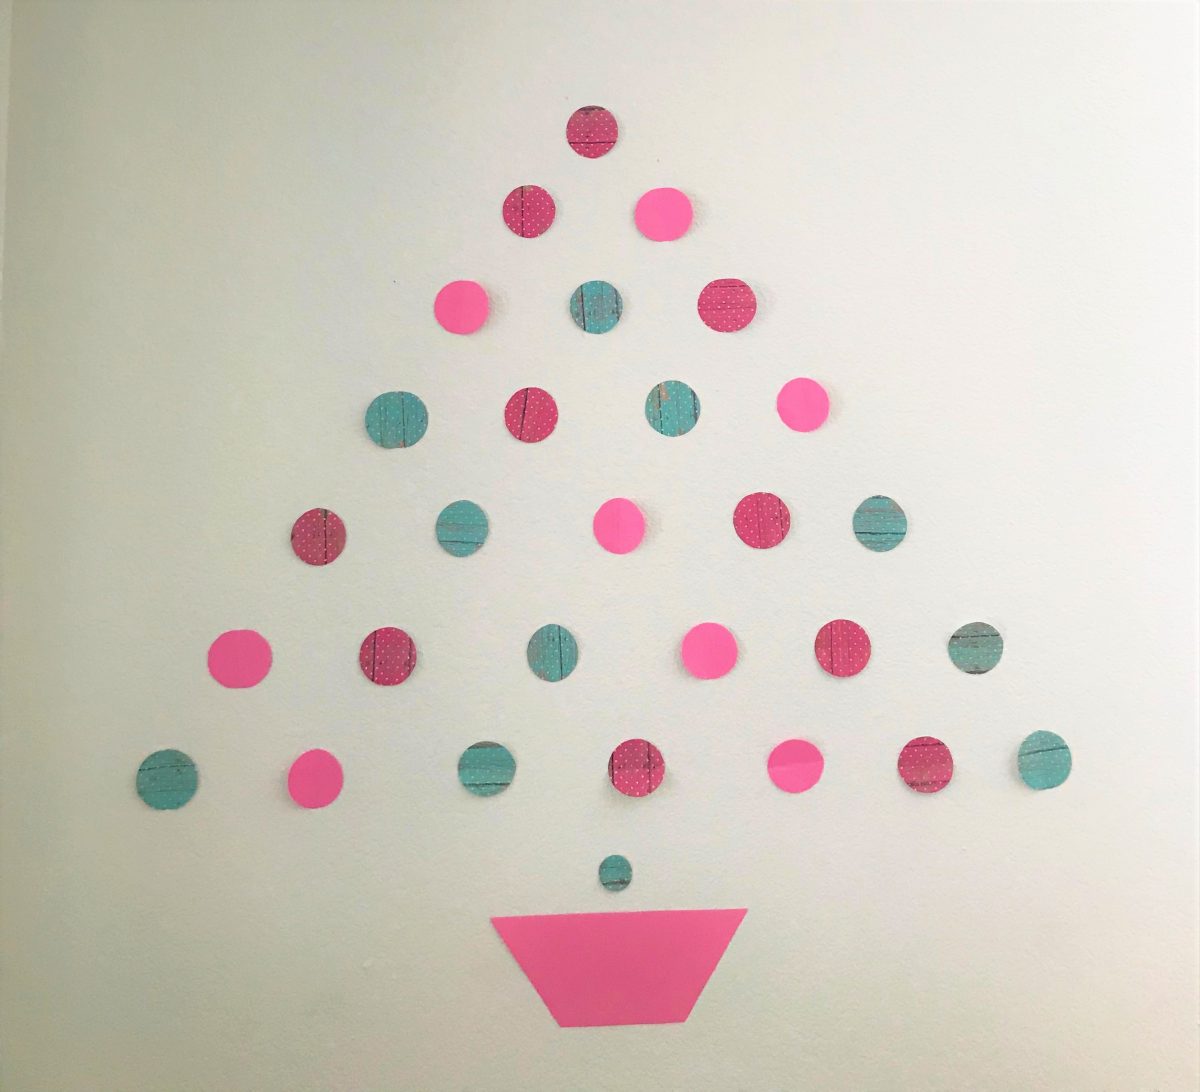
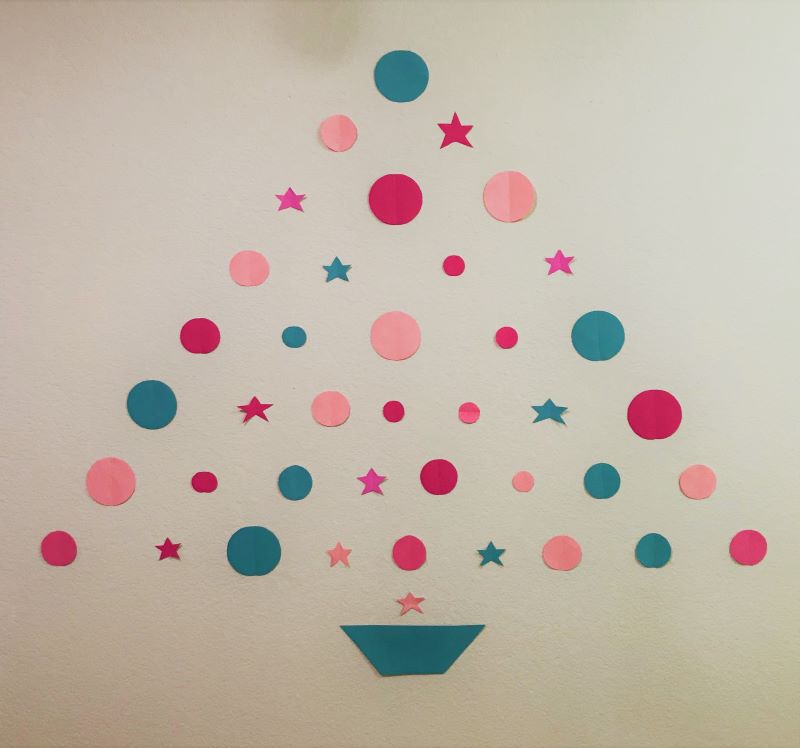
Tree 2: A pink and blue patterned tree with circles all the same size.
Since funds are limited and I have a boatload of craft paper in storage, I decided to get creative and make these polka dot Christmas trees to jazz up our new house this year.
The inspiration for these trees came from Pinterest, of course. I saw them as I was scrolling the app one day and thought to myself, “Hmm…that should be easy to recreate. ”
Tree 3: A bright pink and blue tree with stars and circles of various sizes.
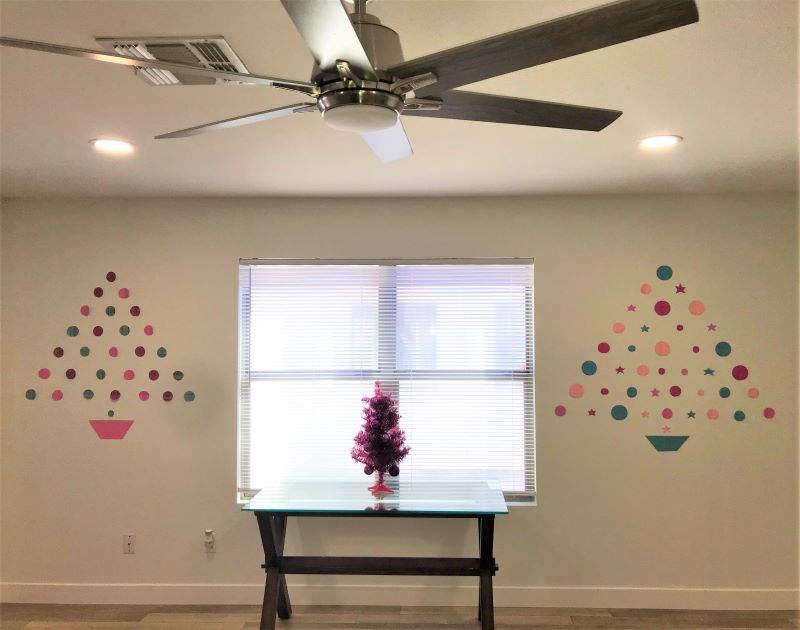
So, I went rummaging through my scrapbook boxes and found some cardstock paper that matched the colors of the tabletop trees we had placed around the house. I decided to design three different trees to adorn the walls of the living room area.
When I started my project at around ten in the morning, I thought it would be a fast process. However, I soon learned that cutting out 96 circles and shapes by hand actually takes a bit of time when you choose to do it all by yourself. In reality, it took me approximately five hours to cut out each circle and star and place them on the walls. Oh well, you live, and you learn. The process was therapeutic, if nothing else.
Pink Polka Dot Tree Wall
In the end, I have three lovely trees adorning my walls. They liven up the room and give us something festive to look at during the holiday season. Plus, they were absolutely FREE. The only thing they cost me was time and effort.
If you are looking for a fun and cheap way to decorate for the holidays, this is a great way to do it. It’s also a great activity to do with the kids and as a family.
Take a look at the steps below to create your own polka dot Christmas tree wall decorations. It’s as easy as 1-2-3.
Supplies (For 1 tree)
9 Sheets of craft paper or card stock – Any color or design that you desire. You may need more. It depends on the size of your circles.
Pencil or marker
Scissors
Wall safe tape or mounting putty
A circular object or stencil to draw each circles
Directions
Draw your circles on your card stock or craft paper (you can also create a template of circles using PowerPoint and print them out on your card stock directly if the paper is 8.5 x 11 and fits into your printer).
Cut out 28 circles. They can be the same size or different sizes. The choice is yours. It all depends on your design.
Cut out a rectangular shape for the bottom of your tree. This will represent the tree stand so to speak.
Layout your tree pattern on the table or floor before you place it on the wall. This way, you know exactly where to place your circles on the wall ahead of time.
Use tape or putty to place your design on the wall. This step should go quickly if you laid out your pattern beforehand. Make sure it looks straight.
Step back and admire your work.
Hopefully, this simple craft idea inspires you to create and decorate. Happy Holidays!