Tag

family

Browsing

I found this tape resist acrylic painting for kids idea on my favorite site Pinterest last month. I instantly thought it would be a quick and easy arts and craft project for my nieces and their cousins to do in their spare time. I found it too simple to resist and decided to buy the canvases as soon as I got the chance.

The Process


I purchased the materials at Hobby Lobby while they were having a huge sale. I’ve listed my supplies below.

Materials

  • Canvas (any size)
  • Acrylic paint (at least three colors)
  • Paintbrushes
  • Painter’s/masking tape (.94″ size)

Steps

  1. Use the painter’s tape to create a design or pattern on your canvas. Make sure the tape is secure and completely flat against the surface.
  2. Dip your paint in your favorite colors and paint within the open spaces left on the canvas.
  3. Allow the paint to completely dry. This may take 30 minutes to an hour depending on how much paint you use.
  4. Gently peel the tape from the canvas to reveal your beautiful artwork.
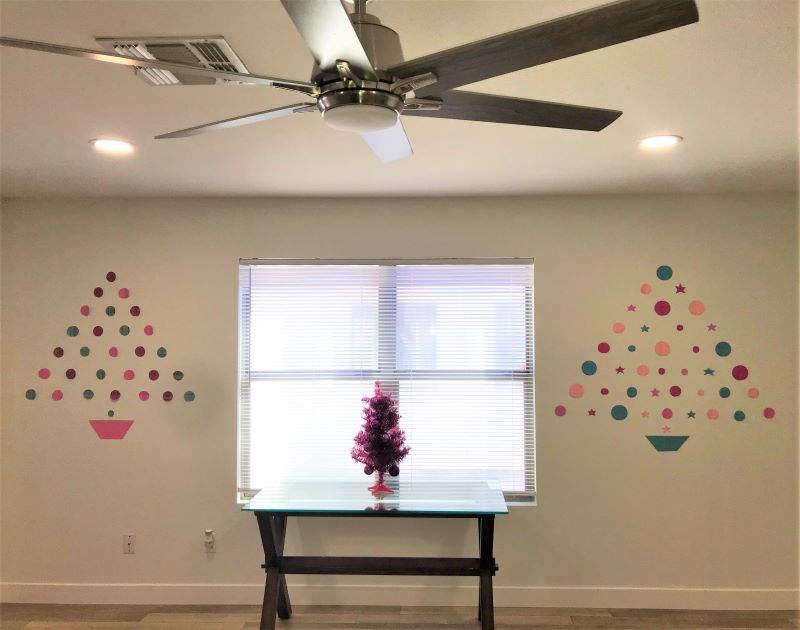
  5. Hang your painting for the world to see.
Tape Resist Painting

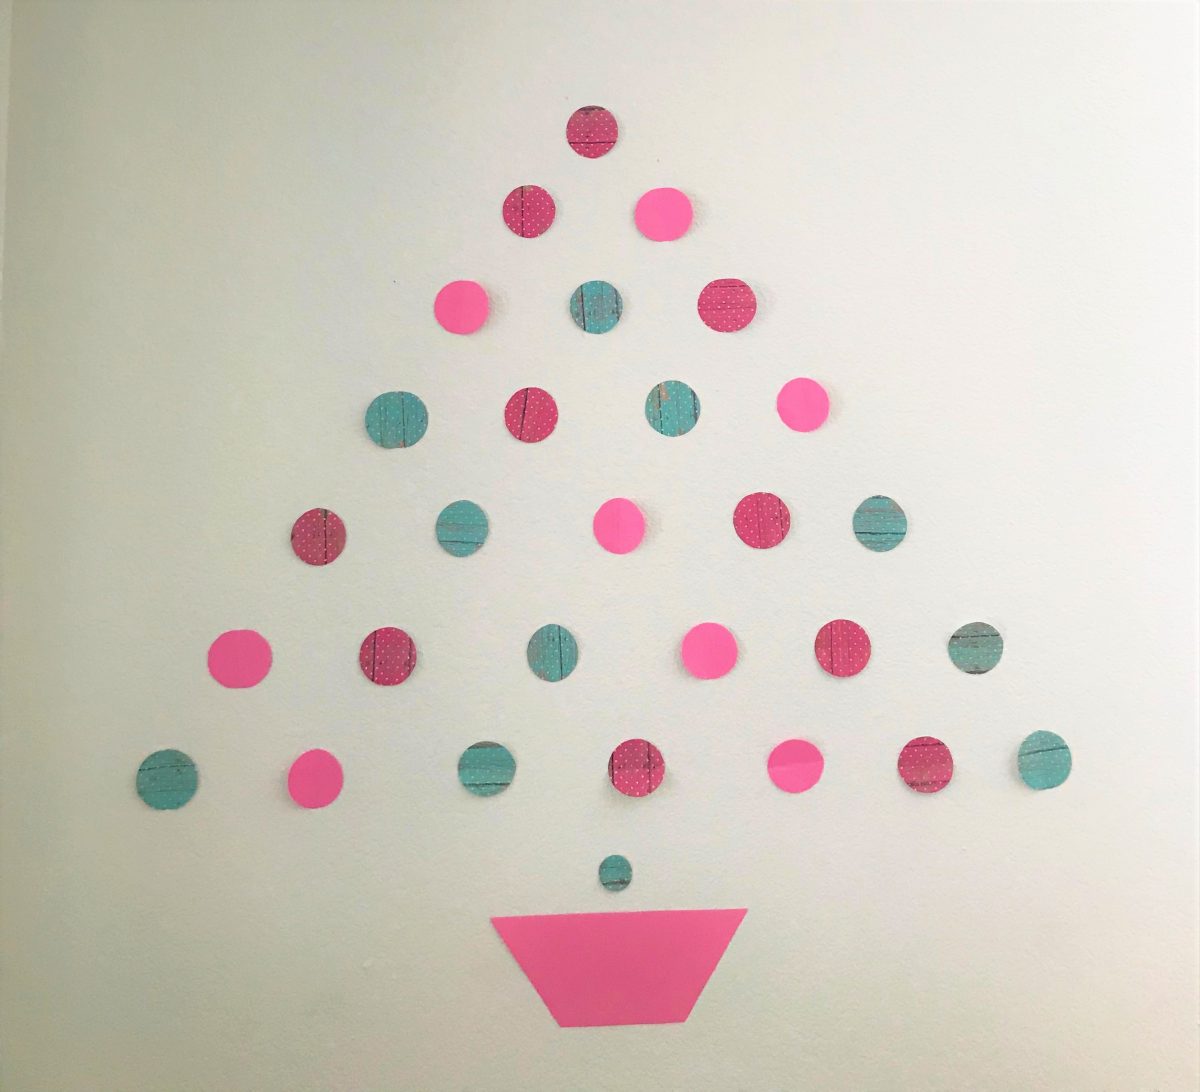
I decided to create my own version of the painting to see how easy the process would be. The set up, painting, and removal of the tape were all fairly simple to do. When I was done I felt confident that the children could do this without a hitch and be pleased with the results.

The Big Reveal

After my painting completely dried, I was happy with my results. In the end, I had a brightly colored geometric pattern that I would proudly hang on the walls of my house.

Tape Resist Acrylic Painting For Kids

I sent the picture off to my nieces’ house to use as an example along with a few pre-taped canvases for them to enjoy. They were happy to see the painting and eager to try the project themselves.

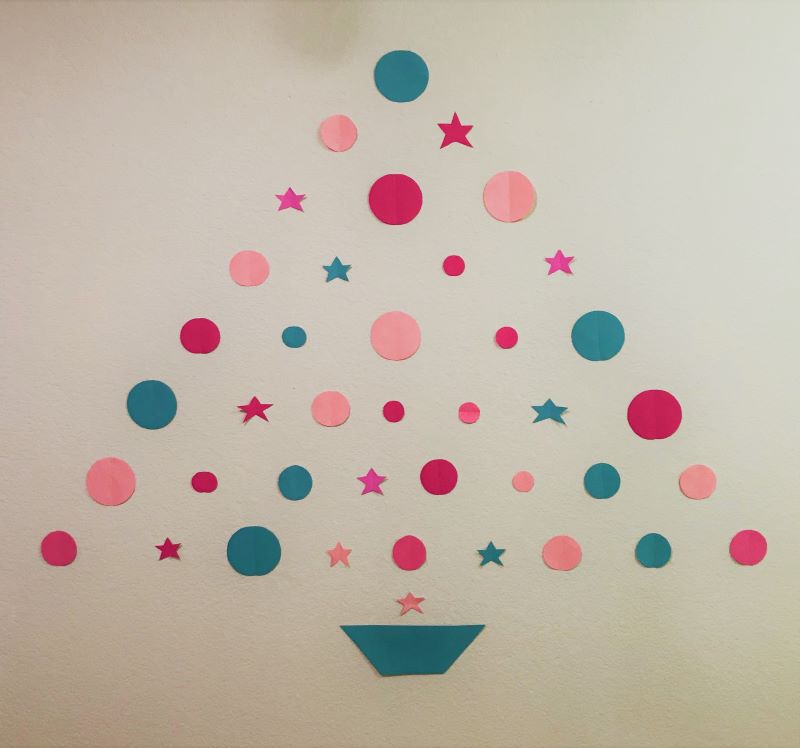
My nieces and their cousins completed their paintings as a fun summer project.

When they were done they had four new lovely multicolored paintings that they were proud to show off and hang in their art gallery.

Final Thoughts

I’m always thrilled to introduce the children in my life to new arts and crafts activities. It brings me joy to see them having fun while being creative and learning a new skill. I strongly recommend doing this art project with the kids in your life. It’s quick, easy, and everyone will experience success with this arts and crafts project.

Do you create arts and crafts projects with the children in your life or family members? Tell me about it in the comments below.

During quarantine, my nieces and I found a few creative ways to keep ourselves busy. One of the ways we kept ourselves occupied was by creating these pipe cleaner butterfly rings I found on Pinterest. I knew the moment I laid eyes on these cuties that they would be a hit with the girls.

What Happened Next?

After I saw the picture, I immediately saved and followed the Pinterest link to the One Little Project website to view the instructions on how to make these adorable little accessories. To my surprise, the rings required very few materials and were simple to make. The materials list and step-by-step pictures clearly explained how to make the rings with ease. A video was also included to make things even easier.

Materials

Image courtesy of pexels.com

Once I had a better understanding of how to make these rings, I needed to check my crafting supplies. Fortunately, I had all of the materials I needed to make the rings. I had plenty of multicolored pipe cleaners to choose from and scissors to cut them down to the required lengths.

The Plan

Enlist Some Help

Next, I had to figure out how I would execute the activity. Since my nieces were ages 2.5 and 7 at the time, they would need assistance making their masterpieces. Therefore, I needed to recruit some help. Fortunately, Gigi (aka Grandma), was available to help. With her assistance, making the rings would be a breeze. I made sure I sent Gigi a YouTube video on how to make the butterfly rings ahead of time so that she would be familiar with the process before we got started.

As usual, I pulled out my materials before we began. I paired Gigi with Ayla while I worked with Noelle. We all watched the video as we made our rings. Since Noelle was only 2.5 at the time, she was only able to be my little helper. She was delighted to hand me the supplies while I made our rings. She watched with amazement as the rings took shape.

Pipe Cleaner Ring Activity
Ayla and Gigi working on their pipe cleaner rings.

The Results

We are too cute!

The entire activity only took about 15 minutes to complete. We were ecstatic with our results. We had made an assortment of rings to adorn our fingers. Of course, we had to take pictures to model our new creations for the world to see. After taking several pictures of our rings, we posted them for friends and family to view online. The rings got rave reviews.

This is a fun arts and crafts project to do with kids. It requires very few materials and the instructions are easy to follow. I would highly recommend this activity to anyone who needs a quick activity to do with their kids. It’s a great bonding activity for both parents and children.

Tree 1: A tree made with the same size circles and varying shades of red.

Christmas is upon us, and it’s time to deck the halls and the walls with pretty décor. For many of us, that means breaking out the decorations from Christmases past and blowing the dust off before we set them out. However, for some of us starting from scratch with limited funds, that means we have to get creative and handy when it comes to decorating for the holidays.

Tree 2: A pink and blue patterned tree with circles all the same size.

Since funds are limited and I have a boatload of craft paper in storage, I decided to get creative and make these polka dot Christmas trees to jazz up our new house this year.

The inspiration for these trees came from Pinterest, of course. I saw them as I was scrolling the app one day and thought to myself, “Hmm…that should be easy to recreate. ”

Tree 3: A bright pink and blue tree with stars and circles of various sizes.

So, I went rummaging through my scrapbook boxes and found some cardstock paper that matched the colors of the tabletop trees we had placed around the house. I decided to design three different trees to adorn the walls of the living room area.

When I started my project at around ten in the morning, I thought it would be a fast process. However, I soon learned that cutting out 96 circles and shapes by hand actually takes a bit of time when you choose to do it all by yourself. In reality, it took me approximately five hours to cut out each circle and star and place them on the walls. Oh well, you live, and you learn. The process was therapeutic, if nothing else.

Pink Polka Dot Tree Wall

In the end, I have three lovely trees adorning my walls. They liven up the room and give us something festive to look at during the holiday season. Plus, they were absolutely FREE. The only thing they cost me was time and effort.

If you are looking for a fun and cheap way to decorate for the holidays, this is a great way to do it. It’s also a great activity to do with the kids and as a family.

Take a look at the steps below to create your own polka dot Christmas tree wall decorations. It’s as easy as 1-2-3.

Supplies (For 1 tree)

  • 9 Sheets of craft paper or card stock – Any color or design that you desire. You may need more. It depends on the size of your circles.
  • Pencil or marker
  • Scissors
  • Wall safe tape or mounting putty
  • A circular object or stencil to draw each circles

Directions

  1. Draw your circles on your card stock or craft paper (you can also create a template of circles using PowerPoint and print them out on your card stock directly if the paper is 8.5 x 11 and fits into your printer).
  2. Cut out 28 circles. They can be the same size or different sizes. The choice is yours. It all depends on your design.
  3. Cut out a rectangular shape for the bottom of your tree. This will represent the tree stand so to speak.
  4. Layout your tree pattern on the table or floor before you place it on the wall. This way, you know exactly where to place your circles on the wall ahead of time.
  5. Use tape or putty to place your design on the wall. This step should go quickly if you laid out your pattern beforehand. Make sure it looks straight.
  6. Step back and admire your work.

Hopefully, this simple craft idea inspires you to create and decorate. Happy Holidays!

Creating arts and crafts is a fun activity for the entire family.  It’s a great way to expose children to the world of art. It allows them to flex their creative muscles, teaches them how to follow directions, and tests their gross and fine motor skills, all while creating a work of art. Plus, it can be an enjoyable experience, whether you are an artist or not.

As a parent, you don’t have to be an artist to do arts and crafts with your kids.  Nor should you be afraid to attempt these activities with your family. You just need a few ideas, materials, and a little patience to get started on your crafting journey. 

Check out the list below for tips and tricks on how to successfully do arts and crafts with your kids and create memories that will last a lifetime. 

1. Pinterest and YouTube are great resources for arts and crafts ideas. 

Both sites have craft ideas for all age groups. Many ideas come with step-by-step directions or video tutorials, which make it easy.  Surf these sites for a variety of ideas.  Create a board or list and save them for later. 

2. Themes are fun.

The holidays provide a great opportunity to create theme-based crafts. Each holiday has a plethora of ideas to do with the kids. You can also incorporate your kid’s special interests to make crafting more interesting and fun.  There are many craft projects about superheroes, dolls, trucks, or cartoon characters that are easy to make.

Noelle Wearing Her Pipe Cleaner Ring

3. Give them a choice.

Show them your list of ideas or online boards.  Let them choose one that tickles their fancy.

4. Choose activities that work with your child’s attention span.

Various factors determine a child’s attention span.  Some children can spend hours doing one activity, while others can only stay focused for 15-20 minutes.  Make a mental note of your child’s attention span and choose crafting activities accordingly.

Ayla Creating Salt Art

5. Keep basic supplies in the home just for crafting. 

You don’t need fancy arts and craft supplies.  Choose crafts that require basic supplies that can be found in your home. Some of these items may already be in your home. 

  • Child safe scissors
  • Glue
  • Tape
  • Markers
  • Color Pencils
  • Plain Paper
  • Crayons
  • Construction Paper
  • Coloring books (these are good to keep on hand to use at any time)

6. Do the craft ahead of time.

This tip is important if you choose a craft that may be a little more on the difficult side.  It will allow you to determine if it’s worth doing the craft or not.  Therefore, test it out to ensure you know how to do it yourself and if it’s worth your time.

7. Gather, pre-cut, and measure materials ahead of the activity.

Preparing materials before you begin saves time. It also makes it easier for younger children who lack fine motor skills to participate.

Kage Creating Salt Art

8. Have older kids gather and prep for the activity.

Kids love to help.  Plus, they should be a part of the process from start to finish as much as possible.

9. Have a clean and spacious area to work.

Choose a place where they can lay out all of their materials and move freely.  Cover the surface with newspaper or cloth if it’s going to be a messy craft project.

Ayla and Gigi making a pipe cleaner ring.

10. Allow them to be creative as they want. 

They don’t have to follow the design to the letter.  Let them come up with their own ideas.  You may be pleasantly surprised by what they create.

11. Make sure they clean up and put things away when they are done.

Since they contribute to the mess, they should clean up when they are done. Cleaning up teaches them to be more responsible.

12. Display their work.

Children love to see the fruits of their labor on display.  So, post it on social media, send it to family members, place it on a wall, or create a gallery.  They will get a kick out of seeing it on display. 

Arts and Crafts Gallery Wall

13. HAVE FUN!!

Crafting is a fun family activity.  Don’t stress about it. Create memories and enjoy the crafts that you make with your kids.

Noelle and Kahlil Collaborating on a craft project.

What are your thoughts?  Do you craft with your kids?  If so, what are your fondest memories of crafting with your kids?  Please share them in the comments below.

BONUS:  For more educational tips and tricks for teachers and parents, check out my other website The Modern Schoolmarm.

I was inspired by my sip and paint outing earlier this week to create a sweet gift for my nieces’ bedroom in Arizona. The original piece of art is called Pretty in Pink III and was created by an artist at Paint Nite.  My painting is my interpretation of the original.  I felt it turned out pretty nice and I was proud to bring it home to place next to my other creations.

As I was staring at my handy work, I was strongly motivated to create another one for my niece Ayla.  Being a little fashionista in the making, I just knew she would love the painting for her room.  The wheels started turing in my head immediately and I mentally created a list of supplies that I would need to buy from Michaels in order to create a copy of the original painting.

So the next day, I set out to Michaels and bought everything I needed to recreate the painting.  For Ayla’s painting, I chose to use a pink background with a blue dress.  After a couple of hours, the painting was complete.  It resembled a child-like version of the original. I was very pleased with my artistic skills once again.

After gazing at my work, I was eager to send it off to Ayla right away the next day, but then I started thinking that I couldn’t paint a picture for Ayla and not have one for her baby sister Noelle. So hours after I completed the first painting, I started creating the second painting.  The second painting had a green background and a yellow dress.  It turned out just as good as the first.

Once I finished inspecting the painting, I deemed it ready to ship. I just knew I was done with my painting endeavors.  I then proceeded to take pictures of all three paintings together and sent them to my mom for approval. My mom thought they were beautiful, but felt that I needed to create a third painting to send because I had no intention of sending the original to Arizona. She thought it would look better as a triptych in their bedroom.  I actually had to agree with her opinion on the matter. 

Needless to say, I created a third and final painting the next day.  For my last painting, I painted a woman facing forward, holding flowers, and wearing a peach colored dress against a blue background. It was my personal spin on the original painting.  She turned out just as I had envisioned her in my mind and she fit perfectly between the two girls.  

Once the third painting was done, I sent the pictures to my mother again for her approval.  She thought it was perfect and ready to go.  I shipped them the next day along with a note explaining the meaning behind the gift and stating that Ayla should pick her favorite painting out of the two girls. I dearly hope that she and the family love the paintings and that they look great in her bedroom.  I’ll write an updated post after she receives the package.  


RALSTON IN BASKET 2                         RALSTON IN CONFETTI                 RALSTON IN BASKET

A few weeks ago I received an early morning text from my friend Marguerite about her cat’s new found love affair with her bridal shower gift.  It would appear that Ralston is quite enamored with the monogrammed hand basket that was intended for shopping.  The stuffing inside the basket is comfy napping material and the basket itself seems to be a great place to play and chill.  Apparently, this bridal shower gift is something the entire family can enjoy.  Even the family pet.  It’s the gift that keeps on giving.  Who knew?  I’m glad everyone in her household can find joy in that gift.  LOL!

Thanks for sharing this with me Marguerite.  It made my day.

Photos Courtesy of Marguerite Daniels Anderson